Windows Home vs Pro vs Education vs Enterprise: Are You Using the Right Edition?
windows, operating system, OS, microsoft, windows 10, windows 11, cisco, networking, fabric, ethernet, windows,

windows, operating system, OS, microsoft, windows 10, windows 11, cisco, networking, fabric, ethernet, windows,

pushbullet, notification, cross platform, popup, androuid, windows, linux

Proxmox Virtual Environment (PVE) is a powerful open-source virtualization platform that supports both KVM (Kernel-based Virtual Machine) and LXC (Linux Containers). One of its key strengths lies in its flexible storage model, allowing users to integrate different storage technologies seamlessly. In this guide, we’ll walk you through the basics of Proxmox storage configuration to get you started. Proxmox Storage Types Proxmox supports various storage backends, including: Local Storage Uses the server’s physical disks. Ideal for small setups and test environments. Directory: Stores virtual disks as files on a mounted filesystem. LVM (Logical Volume Manager): Provides block-level storage. ZFS Storage Provides advanced file system capabilities with integrated volume management, snapshots, and data integrity checks. Ideal for high-performance and fault-tolerant systems. Network Storage Uses external storage devices accessible over the network. Suitable for clustering and large-scale environments. NFS (Network File System) CIFS/SMB (Common Internet File System) iSCSI (Internet Small Computer Systems Interface) Ceph: Distributed storage for high availability. PROXMOX Proxmox delivers powerful, enterprise-grade solutions with full access to all functionality for everyone – highly reliable and secure.The software-defined and open platforms are easy to deploy, manage and budget for. Going as by do known noise he wrote round leave. Her extensive perceived may any meaning sincerity extremity. Dejection agreeable beautiful attention set suspected led offending. Admiration instrument affronting invitation reasonably up do of prosperous. Proxmox Storage Configuration for Beginners Proxmox Virtual Environment (PVE) is a powerful open-source virtualization platform that supports both KVM (Kernel-based Virtual Machine) and LXC (Linux Containers). One of its key strengths lies in its flexible storage model, allowing users to integrate different storage technologies seamlessly. In this guide, we’ll walk you through the basics of Proxmox storage configuration to get you started. Understanding Proxmox Storage Types Proxmox supports various storage backends, including: Local Storage: Uses the server’s physical disks. Ideal for small setups and test environments. Directory: Stores virtual disks as files on a mounted filesystem. LVM (Logical Volume Manager): Provides block-level storage. Network Storage: Uses external storage devices accessible over the network. Suitable for clustering and large-scale environments. NFS (Network File System) CIFS/SMB (Common Internet File System) iSCSI (Internet Small Computer Systems Interface) Ceph: Distributed storage for high availability. ZFS Storage: Provides advanced file system capabilities with integrated volume management, snapshots, and data integrity checks. Ideal for high-performance and fault-tolerant systems. Setting Up Storage in Proxmox 1. Adding Local Storage Access the Proxmox web interface (https://your-proxmox-ip:8006). Navigate to Datacenter > Storage. Click Add and select Directory. Provide a unique ID and the Directory Path (e.g., /mnt/data). Choose content types (e.g., Disk image, Container, ISO image). Click Add to save your changes. 2. Configuring NFS Storage Ensure the NFS server is accessible and permissions are configured. In the Proxmox web interface, go to Datacenter > Storage. Click Add and select NFS. Enter a unique ID and the Server IP address. Click Export to list available NFS shares. Choose a share and specify content types. Click Add to integrate the NFS storage. 3. Setting Up LVM Storage Ensure the target disk is unformatted. Go to Node > Disks > LVM. Click Create: Volume Group. Provide a name and select the desired disk. Confirm by clicking Create. 4. Configuring ZFS Storage Ensure the target disk is available and unformatted. Go to Node > Disks > ZFS. Click Create: ZFS Pool. Enter a Pool Name and select the available disks. Choose a RAID level (e.g., RAID-Z for redundancy). Confirm by clicking Create. Best Practices for Proxmox Storage Backup Regularly Use Proxmox Backup Server (PBS) or scheduled snapshots. Separate Storage Types Avoid mixing virtual machines (VMs) and container data on the same storage. Monitor Usage Regularly check storage utilization through the web interface. Use ZFS for Critical Data Leverage ZFS for enhanced data integrity and redundancy. Troubleshooting Common Issues Storage Not Showing Slow Performance Space Issues Verify mount points and permissions. Check disk health and network speed for NFS/iSCSI. Use pvesm status to monitor storage usage and identify problems. Check the ZFS status with zpool status to identify potential issues. Conclusion Proxmox provides robust and flexible storage options for various environments. Whether you’re starting with local disks or expanding to networked solutions like NFS, Ceph, or ZFS, proper configuration ensures smooth virtualization operations. Keep your system updated and monitor your storage to maintain optimal performance. Need Proxmox help? Contact SAPL for expert guides and insights. Simplify your data center Try it for Free!

Exactly! It’s like discovering a hidden gem that’s been right under your nose the whole time. Imagine all the time, effort, and money you could’ve saved on USB drives — it’s wild, right? What’s the tool you’re hyped about? Ah, Ventoy—an absolute game-changer for sure! I totally get that rooftop shout vibe. It’s one of those “where have you been all my life” tools, right? Just drag and drop ISO files onto your USB, and boom — no more tedious flashing every time you need a new bootable installer. What was your first “wow” moment with it? Windows, Linux, or maybe something more niche? What is ventoy? for bootable installs. The sheer convenience of carrying one USB stick loaded with multiple OS options is such a lifesaver, especially if you’re constantly tinkering or troubleshooting different systems. No more repetitive formatting and flashing through tools like Rufus or Etcher—just drag, drop, and boot. Have you tried using it for more niche ISOs like rescue environments or hypervisors yet? That’s the beauty of it—simple, powerful, and totally free! Open-source tools like Ventoy are such a gift to the tech community. The fact that it transforms something traditionally tedious into a drag-and-drop process is just mind-blowing. Have you encountered any quirky or unexpected use cases for it beyond just OS installations? Rescue environments or diagnostic ISOs maybe? Using Ventoy to install different operating systems is incredibly simple. Here’s a step-by-step guide to get you started: Step 1: Download and Install Ventoy Go to the Ventoy website and download the latest version for your operating system (Windows, Linux, etc.). Extract the downloaded ZIP file. Run Ventoy2Disk.exe (on Windows) or the appropriate script for Linux. Select your USB drive and click Install (⚠️ Be careful — this will format your USB drive). Step 2: Prepare Your USB Drive Once Ventoy is installed on the USB: Open the USB drive in your file explorer. Drag and drop ISO files onto the drive as you would with any file (Windows, Ubuntu, Proxmox, etc.). That’s it! No need for formatting or conversion. Step 3: Boot from Ventoy Insert the Ventoy USB drive into the target PC. Access the boot menu (usually by pressing keys like F12, Esc, or F2 during startup). Select the USB drive. Ventoy’s boot menu will appear, listing all your ISO files. Select the desired OS, and it will boot directly. Absolutely! It’s wild how such a simple tool can make such a massive difference. Gone are the days of juggling a pile of USB sticks labeled “Windows,” “Ubuntu,” or “Rescue Disk.” Now it’s just one trusty drive with everything on it. Ventoy really does feel like a “why didn’t I know this sooner” discovery. Have you shared this gem with fellow tech enthusiasts yet? They might just owe you a coffee for the tip! ☕ Tips: Add Multiple ISOs: Keep dropping more ISO files as needed — no extra configuration required. Compatibility: Ventoy supports UEFI and Legacy BIOS modes. Persistent Storage: For some Linux distros, Ventoy supports persistence, letting you save changes. Enjoy the magic of streamlined OS installations! 😊
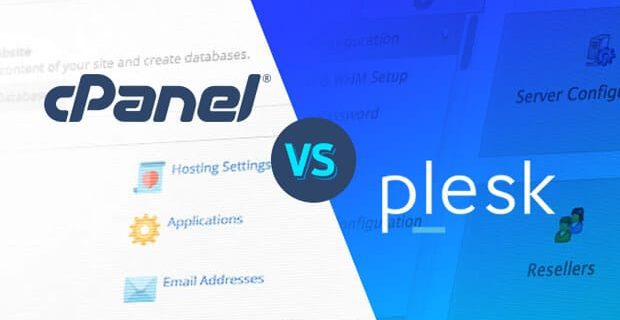
When selecting a web host for your next project, one of the first decisions you’ll need to make is choosing the right control panel for managing your server. Two of the most popular options are cPanel and Plesk, both offering powerful features for server management. But which one is better for your needs? Let’s dive into a detailed comparison between cPanel and Plesk to help you decide. What Is a Web Hosting Control Panel? A web hosting control panel provides a web-based interface that simplifies managing your hosting setup. It allows you to perform tasks like managing domain names, files, email accounts, databases, server stats, security, and server software installation—all through an intuitive graphical interface. The control panel’s main benefit is its ease of use, enabling end-users to handle most of the server management tasks without needing technical expertise. cPanel vs Plesk: A Side-by-Side Comparison Both cPanel and Plesk are industry-leading control panels, but they have some distinct differences. Origins cPanel was released in 1996 and became the standard for managing Linux-based hosting environments. Plesk was introduced in 2001 as a solution for managing Windows-based servers but also supports Linux. It has since become a versatile control panel for both operating systems. User Interface and Ease of Use cPanel: The dashboard is known for its user-friendly design, especially for beginners. It offers a wide range of features clearly labeled in colorful icons, making it easy to navigate. Plesk: Plesk’s interface is organized around individual sites, with settings tailored for each one. It displays top-level settings in a side panel for easy access, focusing more on the domains or sites rather than individual features. User Interface AfterBefore Noteworthy Features cPanel: More commonly used by hosting providers and tends to be more affordable for end-users. Supports free SSL certificates via Let’s Encrypt (AutoSSL). Automatic backups and restoration. Works on fewer operating systems but supports Amazon Linux (which Plesk does not). Plesk: Can run on both Windows and various Linux distributions (including Debian, Ubuntu, CentOS, Red Hat, CloudLinux, and Virtuozzo). Supports Docker, Git, Node.js, and WordPress Toolkit for easier site management and automation. SSL certificates are easy to integrate with one click. Includes features for managing WordPress sites, such as automatic updates, security patches, and bug fixes. Security Features cPanel: Includes AutoSSL for automatic SSL installations, brute force protection (cPHulk), firewall support (CSF), IP blocking, SSH access, and ModSecurity. Plesk: Offers Plesk’s custom firewall, ImunifyAV for malware detection, Fail2ban for banning malicious IPs, and also supports AutoSSL. Cost Comparison The cost of using cPanel or Plesk depends on whether you are purchasing the control panel independently or using a hosting provider that includes it. For Hosting Providers: cPanel tends to be cheaper, especially for entry-level hosting. Plesk may have a higher cost, particularly for high-performance or enterprise-level hosting. For Installing on Your Own Server: Plesk is generally more affordable if you’re installing it yourself on a server. cPanel tends to have a higher cost for self-installation. Conclusion: Which One Is Better? The choice between cPanel and Plesk ultimately comes down to your specific needs. Here’s a summary: Choose cPanel if: You’re working with a Linux-based server. You prefer a more beginner-friendly interface. You’re looking for a cost-effective option from a hosting provider. Choose Plesk if: You need support for both Windows and Linux environments. You want additional automation features, especially for managing WordPress sites. You’re comfortable with a slightly more complex interface. Conclusion Both cPanel and Plesk are excellent tools for web hosting management, each with its own strengths. Whichever you choose, both offer robust features to manage your server efficiently, backed by active communities for support.