Dante Audio Explained

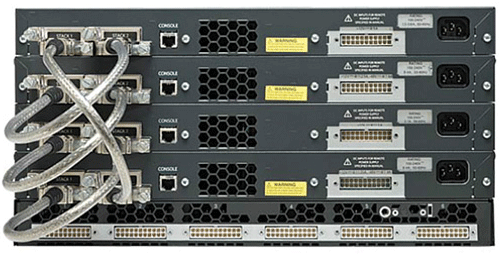
DANTE. It’s a networking protocol and it is quickly being integrated into many Production Sound Mixers’ workflow. Full disclosure, I am a Dante user, which I had to license by purchasing a Dante-enabled product. Dante is owned by Audinate, an Australian company, the seeds of which were sown by some former employees of the Motorola Research Labs, shuttered in 2003. Co-founder and Chief Technology Officer Aidan Williams explains. “I was constantly connecting my synth to a mixer, to a sound card, MIDI cables, all sorts of different connections,” he recalls. “To me, it seemed like a networking problem. Why make all those different connections when you could integrate it into a single network?” In 2006, David Myers joined Williams to form Audinate Bruce Jackson, Vice President of Dolby Labs’ Live Division, an early advocate, made the Dolby Lake Processor the first Dante-equipped professional audio device to be used at a performance of Barbra Streisand in Washington, D.C., in 2008. That same year, Lee Elison joined the company, opening its US headquarters in Portland, Oregon. Dante has played a role in numerous mission-critical events; from the 2010 Winter Olympics in Vancouver, the Pope’s appearance at World Youth Day in Sydney, to hundreds of concerts by major music performers. There are more than 170 manufacturers who have partnered with Audinate, representing more than five hundred different products that are Dante-enabled. How Dante works? In its simplest form, Dante is a protocol for communicating multiple audio channels over standard Ethernet and IP networks. Audio signals between Dante-enabled devices are routed using Dante Controller software. In the analog world, audio connections are point-to-point and individual copper cables representing each channel. In Dante, the physical connecting point is irrelevant as long as all the devices are connected to the same network, audio signals can be made available anywhere and everywhere. Patching and routing are configured in software and not over physical wired links. Depending on the application, Dante allows up to 512 bidirectional channels of audio to be sent and distributed over an Ethernet network, using CAT-5e or CAT-6 cable. Dante was built to work on Gigabit Ethernet, so it already rides a fat pipe. Those 512 bidirectional channels can be sent on a 1Gb link, uncompressed, 48kHz, 24-bit audio. Latency can be as low as .25mS. One link can simultaneously carry audio with different sample rates and bit depths. You can also set up a system with multiple network zones, each with a different latency to match the needs of your equipment. There are other AOE (Audio Over Ethernet) protocols available. The most popular are: CobraNet Peak Audio developed CobraNet in 1996. It accommodates up to sixty-four bidirectional channels of audio over a single CAT-5 or fiber-optic cable. You aren’t going to get advanced features like self-configuration, bandwidth adaptation or error correction. Since it’s a digital signal, equipment does have the ability to process the audio, but that’s a function of the manufacturer’s gear, not CobraNet itself. MADI MADI (Multichannel Audio Digital Interface) was an AES standard protocol, developed in 1991 and further improved by AMS Neve, Solid State Logic, Sony and Mitsubishi. It is a unidirectional (point-to-point) approach that allows up to sixty-four audio channels over coaxial or fiber-optic cables and less commonly CAT-5 from a few manufacturers. How to use Dante? Simply purchase a mixing console and recorder that has Audinate Dante available. Consoles such as the Yamaha 01V96 and 01V96i have a single-card slot to accommodate a Dante card. There are many other consoles that do the same; Behringer, Allen & Heath and the Soundcraft Expressions and Performer series to name a few. Many manufacturers have Dante built in like the Yamaha QL-1, the Sound Devices PIX 260i, the 970 and the Cantar X3. Dante devices have a primary and secondary port for redundancy, meaning, there are two identical but separate networks providing a failsafe if one of the networks fails. You can disable Dante Redundancy Mode and use the second port to connect to another Dante-enabled device. Daisy-chaining Dante devices can be done, with caution, but it is recommended to use a Gigabit Switch in a “star” topology to connect to multiple Dante devices. Gigabit Switches Gigabit Switches are just that, multi-port switches that can handle high-speed audio traffic with excellent management, often called QoS or Quality of Service. Some of us are using simple 5-port switches, such as the Netgear GS105, which retails for around $40 and can be powered via 12 volts. Others prefer the Cisco brand, starting with eight ports and up. Whatever you purchase, make sure they are not EEE (Energy Efficient Ethernet), also known as Green Ethernet. These units will reduce power to individual switches during periods of low network traffic, resulting in poor synchronization and even signal dropouts! Dante Controller will also work with other DAW software like Boom Recorder, Pro Tools (9 and up), Logic and Cubase up to sixty-four channels. This is achieved via Dante Virtual Soundcard software. Dante networks are not restricted to digital consoles and peripherals. You can connect analog equipment to Dante interface boxes that do the A to D conversion.

Understanding “PoE” and Its Industry Standards

What Is PoE in Networking? Power over Ethernet delivers electrical power to PoE-enabled devices using your CATx network cables. Because you don’t need to run electrical wiring, PoE saves money in materials and installation time. It’s also flexible, especially for remote applications, since it doesn’t require a nearby electrical outlet. These and other benefits have led to a sharp increase in PoE’s popularity in recent years. However, the limiting factor has always been power. How Does PoE Work? The way it works is simple. Ethernet cable that meets CATx standards consists of four twisted pairs of cable, and PoE sends power over these pairs to PoE-enabled devices. First PoE standards use two twisted pairs to transmit data, while the remaining two pairs are used for power transmission. With the new PoE standards, power and data are both sent over all four twisted pairs. When the same pairs are used for both power and data, the power and data transmissions don’t interfere with each other. That’s because electricity and data are transported at opposite ends of the frequency spectrum. Electricity has a low frequency of 60 Hz or less, and data transmissions have frequencies that can range from 10 million to 100 million Hz. What Is the 802.3at PoE Standard? The original IEEE 802.3af-2003 PoE standard provides up to 15.4 W of DC power on each port. The updated IEEE 802.3at-2009 PoE standard, also known as PoE+ or PoE plus, allows for up to 30 W of power to Type 2 devices. That’s sufficient power for devices such as VoIP phones, wireless access points, and security cameras. But it’s not enough for technology like flat screen displays, LED lighting, or retail POS terminals. Introducing the 802.3bt PoE Standard To meet the demand for higher power, the IEEE released a new PoE standard at the end of 2018, to significantly increase capacity. IEEE 802.3bt allows for up to 60 W to 100 W of power at the source by providing power over four pairs of wires (compared to the previous technology’s ability to power over just two pairs). This increase in power allows you to use PoE for a greater range devices and applications. As an added benefit, the new standard will boost energy efficiency by minimizing power loss in the cable, potentially cutting power loss in half. The new standard will include support for 2.5GBASE-T, 5GBASE-T and 10GBASE-T, while existing standards have a maximum speed of 1-Gbps. This new support will create intermediate data speeds between existing standards. PoE Types and Power Levels Previous PoE technology included PoE Type 1, also called IEEE 802.3af, and PoE Type 2, better known as 802.3at or PoE+. Both utilise 2-pair Power over Ethernet, Type 1 with a maximum of 15.4 W per port and Type 2 with a maximum of 30 W per port. With the new 802.3bt standard come two new options: Type 3 and Type 4. Type 3 is also called 4-pair PoE, 4PPoE, PoE++, or UPoE. It provides 60 W of power per port and is ideal for video conferencing equipment, multi-radio wireless access points, PTZ cameras, and building management devices. Type 4 (another designation is high-power PoE) offers the highest power capabilities, potentially up to 100 W of DC power (71.3 W to each device), and can support flat screens and laptops. For more detailed specifications on PoE Type 4 and other types, you can refer to the following table. Name IEEE Standard Power to Powered Device (PD) Max. Power per Port Energized Pairs Supported Devices PoE IEEE 802.3af 12.95 W 15.4 W 2-pair Static surveillance cameras, VoIP phones, wireless access points PoE+ IEEE 802.3at 25.5 W 30 W 2-pair PTZ cameras, video IP phones, alarm systems PoE++ IEEE 802.3bt (Type 3) 51 W 60 W 4-pair Video conferencing equipment, multi-radio wireless access points PoE++ IEEE 802.3bt (Type 4) 71.3 W 100 W 4-pair Laptops, flat screens PoE Applications and Benefits Use one set of twisted-pair wires for both data and low-wattage appliances. In addition to the applications noted above, PoE also works well for video surveillance, building management, retail video kiosks, smart signs, vending machines, and retail point-of-information systems. Save money by eliminating the need to run electrical wiring. Easily move an appliance with minimal disruption. If your LAN is protected from power failure by a UPS, the PoE devices connected to your LAN are also protected from power failure. Black Box offers a wide range of PoE products that allow you to take advantage of higher-power capabilities of PoE such as the following: PoE Ethernet Switches PoE Ethernet Switches can act as a power source equipment besides their usual functions. They inject power into the Ethernet cable to power the attached PoE-enabled devices such as wireless access points and security cameras. PoE Splitters PoE Splitters receive a PoE signal with data and power. They separate data and power onto two different lines to support non-PoE devices. PoE Repeaters/ PoE Extenders Enable extension of PoE connections beyond the 100-meter limit to access far away PoE devices such as access points, cameras, and VoIP phones. PoE Media Converters PoE Media Converters are the ideal way to extend your network over fibre or copper and also provide power to remote PoE devices to long-distance data links. They act as a copper to fibre converter and power source equipment all in one device. PoE Injectors PoE injectors carry data and power simultaneously over a single Ethernet cable. These type of Injectors power various VoIP phones, security system cameras, wireless network access points, Bluetooth® access points, and other 802.3af-compatible equipment. With it, you avoid the cost and hassle of installing AC power at remote cameras, access point, or thin client. Move equipment from room to room without costly, time-consuming rewiring.

Cisco 9100AX conversion for surveying

This post covers the process of converting and configuring a Cisco 9100AX access point for surveying. This assumes the AP was shipped with a CAPWAP image loaded. What you’ll need: Cisco 9100 Access Point Power source such as a PoE+ OR PoE Adapter USB to Serial Adapter and Console Cable Cisco account to download software About 30 minutes Process Overview Unbox and power on AP Connect your laptop to the second port on your PoE injector Download the software IP config and start up tftp server Configure the AP with an IP address and issue upgrade command Configure EWC Join the AP to the controller Configure the AP for surveying Ready for survey! Step 1 – Unbox and power on your AP Connect your AP to your PoE injector via the mGig port to power on the access point. It is best practice to reset your AP before continuing. This is completed by holding down the reset button while powering on the AP and holding down for >20 seconds after your console session mentions that the reset button is pressed. Step 2 – Connect your laptop to the second port on your PoE injector PoE Injector Connections Connect your computer to the “DATA IN” port to make a direct connection to the AP. Step 3 – Download the software Navigate to software.cisco.com, select Wireless > Access Points > (Your model) then select IOS XE Software Select your software to download. I chose the Gibralter release 16.12.2s release (after trying to use the 16.12.3 release and running into a whole slew of issues with the AP not joining the controller). Step 4 – IP config and start up tftp server Configure your network adapter for an address in the same “network” as your AP. In this example I use tftpd64. Point you the directory to where you unzipped the software downloaded in step 3. Select the appropriate interface that is connected to your injector. Step 5 – Configure your AP with an IP address and issue upgrade command Assign your CAPWAP AP an IP Address Log in to your AP using “Cisco” as the username and password.Configure your AP with an IP address using the following command:AP#capwap ap ip adress 192.168.1.2 255.255.255.0 192.168.1.1Format – capwap ap ip address (IP) (Mask) (Gateway) AP Model and Image File Names Use the table above to determine the name of the AP image to copy.Issue the upgrade command with the image names for both the AP and the EWC.AP#ap-type ewc-ap tftp://192.168.1.5/ap1g7 tftp://192.168.1.5/C9800-AP-iosxe-wlc.binFormat – ap-type ewc-ap (AP image file path) (EWC image file path)Note – If your AP is running an older code version, you will use “ap-type mobility-express” instead. Issue the Upgrade Command You should now see the download progress on both ends. The AP will download both files. tftpd64 Progress AP Image Download Progress After downloading, the AP will reload and upgrade. You will then be presented with the option to enter the initial configuration dialog for the EWC, which leads us into step 6. Step 6 – Configure EWC EWC Initial Configuration Enter “yes” and “yes” to enter the initial configuration wizard.You will then be asked to configure the Hostname, Enable secret, Enable password, VTY password, and whether to configure SNMP network management. Next, you will be presented with an interface summary and be prompted to configure an interface used to connect to the “management network”. This is the only interface and will be where APs join and how you manage the device over the wire. After entering the name of the interface, I used the suggested settings. Configure Interface Gi0 Finally, you will be asked to[0] Exit to IOS without saving[1] Restart the setup without saving[2] Save the configuration and exit. Complete Initial Configuration You will then be kicked into command line with the following banner shown. EWC Banner The mentioned “ewc_day0_device_provisioning_guide” file states that the following configurations need to be completed:1. Hostname2. Admin username/password3. Configure the AP Profile4. Configure the WLAN5. Configure the Wireless Profile Policy6. Configure the Default Policy Tag7. Turn on Global Encryption8. Save the Configuration The commands to complete the tasks are below for easy copy/pasting. conf tap profile default-ap-profileusername admin password 0 Cisco123 secret 0 Cisco123exitwlan Howiwifi-Survey 1 Howiwifi-Surveywlan Howiwifi-Survey 1 Howiwifi-Surveyno security wpa akm dot1xsecurity wpa psk set-key ascii 0 Cisco123security wpa akm pskno shutexitwireless profile policy Howiwifi-Surveyno central associationno central dhcpno central switchinghttp-tlv-cachingsession-timeout 86400no shutexitwireless tag policy default-policy-tagwlan Howiwifi-Survey policy Howiwifi-Surveyexitservice password-encryptionpassword encryption aeskey config-key newpass Cisco123exitwrite After saving, the Day0 configuration will be “cleaned up” and the new configuration applied. You can then log into your configured controller using the specified password above. Step 7 – Join the AP to the controller You will now notice that the “AP” has not yet joined the controller due to not receiving an IP address via DHCP. This is verified by issuing “show ap summary” on the controller and by viewing the LED status indicator on the AP. AP Searching for Controller We are relying on the AP connecting to the internal EWC automatically when surveying. This can be accomplished by accessing the console of the AP and configuring an IP address (the former configured IP address configured in step 5 is removed during the upgrade). Configure the AP with an IP address The command “wireless ewc-ap ap shell username (username)” is the EWC equivalent of the “apciscoshell” command from mobility express. Because the AP has no configuration on it, we use the username “Cisco” (the default) in the command the first time we connect. The AP will now be joined to the controller. You can type “exit” to return to the EWC and issue “Show AP Summary” to view the AP. The LED status indicator should now be green. If it is not connected, follow the standard CAPWAP discovery troubleshooting steps. AP joined to EWC You should be able to see the configured SSID broadcasting using a spot check tool such as Wi-Fi Analyzer for android. Spot check SSID Step 8 – Configure the AP for surveying The configuration you use to survey will vary so I will provide all of the information …

Things to look for in a Hardware Firewall

You’re absolutely right. The rapid growth of home broadband use, coupled with the shift towards remote and hybrid work environments, has significantly increased the potential for cyber threats. Consumer-grade routers often lack the advanced security features needed to protect against sophisticated attacks. By adding a hardware firewall appliance, you can bolster your network’s defense and gain control over traffic management, intrusion detection, and more secure connections to corporate networks. A hardware firewall appliance can provide features such as VPN support, deep packet inspection, intrusion prevention systems, and customizable filtering. These help ensure that your home network remains safe while connecting securely to remote work environments. Do you currently have a firewall in place, or are you considering setting one up? Throughput and ports You want high throughput numbers, especially once you turn on filtering and inspection Before looking deeper into the functionality of a hardware firewall, you want to know two things. The first is how many ports it has and the speed of those ports, because that determines both current and future setup needs. As hardware firewalls, when used in home networks, are usually set up as edge devices, they go between the internet and your internal hardware. That means you might only need two ports, but it’s important to match the speed of these to your existing hardware so they can all sync up together. They could also be used for internal segmentation, but that’s less likely at home. It’s still important to match port speeds with existing hardware, but you might want more ports so that future expansion can be planned. You’ll also want to check the throughput of the firewall, which is the volume of traffic that can pass through at any one time. Most firewalls will support 1Gbps+ throughput, so it’s not as important to check, but if you’re buying ex-enterprise or other used hardware, check the specs because older devices can drop the throughput drastically once you put filtering, intrusion prevention, and other security features on.   Basic functionality Hardware firewalls have some features that are generally thought of as table stakes, like access control lists to allow or deny web traffic based on predetermined rules. This list of rules filters traffic before it hits the network, making it easier for the other security features to do their jobs while hopefully stopping unauthorized traffic. For example, you can set them up to only let video call data go to certain devices on your network, so other attempts will bounce off the firewall. While they’re also part of the software firewall in your operating system, having them on a dedicated network appliance means the rules get applied to all traffic, not just that aimed at your computer. They’re best when used in conjunction with a stateful firewall that can monitor every packet in a session and detect and reject any unauthorized traffic. Virtual Private Networks(VPNs) Whether you need to access your home network from outside, or use a computer to connect to a corporate computing environment at your workplace, having VPN support on your hardware firewall is important. It’s not just that it will encrypt your data going both ways, but it also acts as another layer of access control, ensuring that devices that aren’t supposed to be on your network aren’t able to connect. It’s also important to have multi-factor authentication for any VPN connections, as it’s the best way to ensure that only authorized users can connect through your firewall. Advanced security features Hardware firewalls can also have multiple advanced security features that might slow down throughput on your network but make it much safer as a result of them running. This could include deep packet inspection to inspect the contents of data packets as they go through the firewall, with a much wider range of metadata inspected than a simple stateful firewall. Even malicious encrypted data can still be guarded against, as the metadata and routing information can’t be encrypted. This works in both directions, so it’s a good way to guard against data exfiltration and malware or other issues spreading around your internal network. Some hardware firewalls have threat intelligence, which gets real-time updates for malware and other threats found in the wild, so they can better protect against emerging threats without waiting for larger updates. Or you can set up access lists based on the applications that are supposed to be allowed through the firewall so that even if malware makes it through unless it infects one of those programs, it can’t dial back home. Quality-of-Service While all the active monitoring and inspecting of packets is good for security, it slows down the throughput of the network as a result. Having Quality-of-Service rules running on the network appliance is an important way to ensure that every computing device that needs bandwidth gets its fair share while the security tools get enough to do their job as well. Security features that slow your users down too far will have them going to other means for internet access, which limits your overall security.

Windows 11’s hidden features

When Windows 11 debuted back in 2021, people had mixed feelings about it, because while the design was refreshing, useful features like the drag-and-drop items on the taskbar were missing, leading to outrage. The taskbar drag-and-drop and other missing features were reintroduced to Windows 11 in the 22H2 update. Now, after more than two years, the software giant is once again rolling up its sleeves to take the drag-and-drop to the next level to make sharing effortless.   Windows 11’s new drag-and-drop feature makes sharing easier than ever There are many ways to share files locally on Windows 11, and all of them can come in handy, depending on your requirements. Microsoft has added another convenient, and perhaps the easiest way, to share files using a new “Drag Tray” capability that you can trigger using drag-and-drop. The way it works is simple. The tray appears at the top of the Windows desktop when you drag items from File Explorer in that direction. You’ll see the tray showing a list of a few apps and More options, clicking which will open the Windows 11 share sheet, where you’ll find many other sharing features, like Nearby Share. While the demo shows the feature currently works if you know how to turn it on, it’s unclear whether the sharing tray will trigger when the File Explorer app is in full-screen mode. How to enable Windows 11’s new Drag Tray feature This feature is currently hidden in the latest Windows 11 beta build, which means you won’t see it even after installing the latest beta Insider update. In addition to the latest beta build, you’ll also need ViveTool and enable id:45624564, 53397005 to enable the new share tray functionality right now.